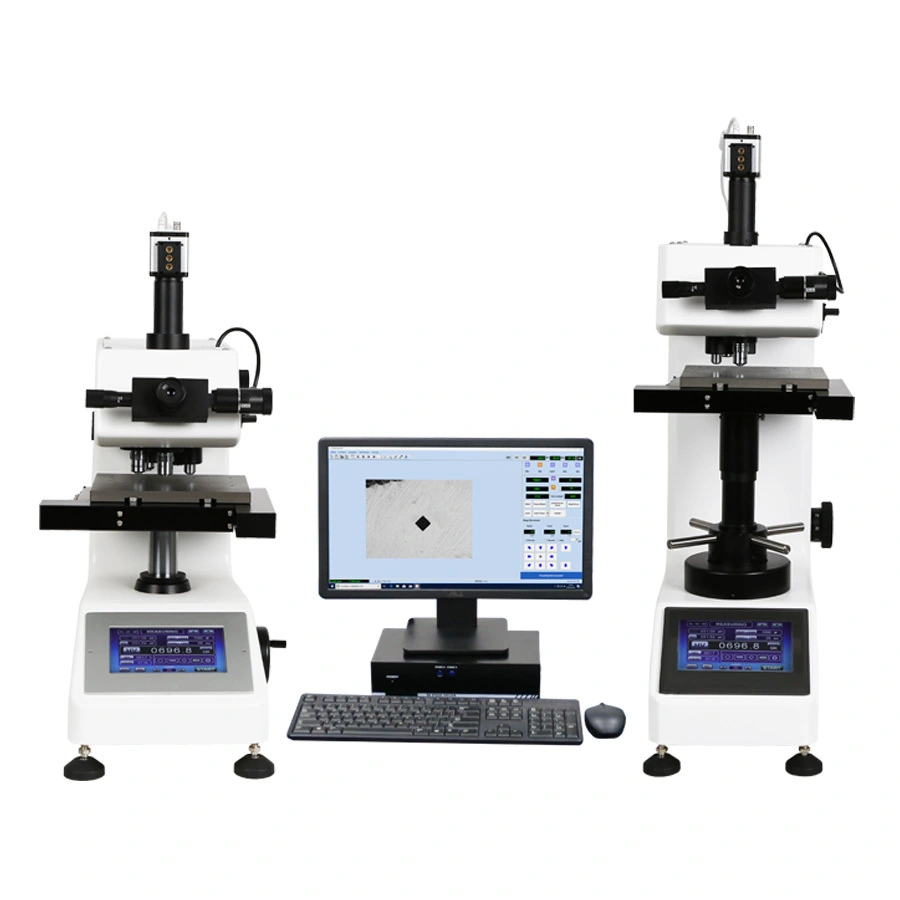
AutoVicky ZVK-MVH50010 Automatic Micro&Macro Vickers and Knoop Hardness Tester
Sinowon AutoVicky ZHV-MVH50010 uses one controller and one PC to control two Hardness testers, one is AutoVicky ZVK-MH1010F Automatic micro Vickers and Knoop hardness tester with autofocus-system, another is AutoVicky ZHV-VH5010 Automatic Macro Vickers hardness tester Both two-unit have equips with the motorized X-Y auto-stage, it has auto-measurement about the indentation of Vickers and Knoop, and it can make measurement of case depth automatically, it eliminates human operation error, largely improves working efficiency, makes hardness testing measurement more accurate and uncomplicated.
Product Characteristics
◆ Auto-stage, Auto-focus, Auto-measurement and Vickers hardness testing system;
◆ Loading-force: Precise dead weights ensures the loading force system reliably and precisely;
◆ Optical-path: 160mm High-resolution optical microscopy path makes image of indention sharply and excellent;
◆ Auto-Turret: the switch position of HV indenters and 10x/20X/40x objectives is repeatable and accurately;
◆ Auto-stage: it is driven by precise step motor with large travel size 100x100mm and heavy load ability ;
◆ Auto-Focus: Apply high resolution optic system and auto focus technology, 3A software can realize auto focus and auto hardness evaluation if the indention size is larger than 8um ; It is autofocus about MicroVickers and Knoop, manual-focus for Macro Vickers.
◆ Auto-Measurement: automatic hardness testing and measurement software:3A can control hardness tester and data communication, includes the switch of 10x, 20x, 40x, 60x objectives and Vickers indenter, auto loading, dwell and unlo ading, single or multiple indentation, set step distance, movement mode, auto record indentation dialog line and hardness value, auto generate CHD depth and hardness curve, error statistics, test times group statistics, generate Excel and Word format report.
Product Application
Vickers method is based on an optical measurement system, it specifies a range of light loads using a diamond indenter to make an indentation which is measured and converted to a hardness value. It is very useful for testing on a wide type of materials, but test samples must be polished to enable measuring the size of the impressions. A square base pyramid shaped diamond is used for testing in the Vickers scale. Typically MicroVickers loads are very light, ranging from 10gm to 1kgf, MacroVickers loads can range up to 50Kgf.
Micro Vickers hardness methods are used to test on metals, ceramics, and composites - almost any type of material. Since the test indentation is very small in a Vickers test, it is useful for a variety of applications: testing very thin materials like foils or measuring the surface of a part, small parts or small areas, measuring individual microstructures, or measuring the depth of case hardening by sectioning a part and making a series of indentations to describe a profile of the change in hardness.
Specification
Commodity | Automatic Micro&Macro Vickers and Knoop Hardness Tester | |
Model | AutoVicky ZVK-MHV50010 | |
Code# | 822-340AF | |
Focus-Mode | MicroVickers/Knoop: Twin Auto-focus/Manual-focus; MarcoVickers: Manual-focus | |
Load-System | High-precision-weight | |
Micro Load | gf | 10 / 25 / 50 / 100 / 200 / 300 / 500 / 1000 |
mN | 98.07/ 245.2/ 490.3/ 980.7/ 1961/ 2942/ 4903/ 9807 | |
Macro Load | Kgf | 1 /2/ 3 / 5 / 10 / 20 / 30/50 |
N | 9.807 / 19.614 / 29.421 / 49.035 / 98.07 / 196.14 / 294.21 / 490.35 | |
Loading-Mode | Automatic loading, dwell and unloading | |
Dwell Time | 5 ~ 99 s can be adjustable | |
Turret System | Auto-Turret | |
Dual Optical Microscopy System | High-resolution Optical Microscopy Path 10x digital measuring eyepiece 10x, 40xobjective for MicroVickers/Knoop measurement 10x, 20xobjective for MarcoVickers measurement 0.5x C-mount with camera for dual vision measurement | |
Magnification | Optical observation magnification : 100x ( 10x Objective and 10x Eyepiece ) | |
Optical measurement magnification :100x, 200x, 400x ( 10x, 20x, 40x Objective and 10x Eyepiece ) | ||
Digital observation magnification: 350x | ||
Digital measurement magnification:350x, 700x, 1400x | ||
Light Source | LED parallel Illuminator | |
Digital Image System | 0.5x C-adapter and 1.3Mpixel CMOS camera | |
Max. Specimen Height | 90mm | |
Max. Specimen Depth | 110mm | |
Hardness Scale | Switch between HV and HK | |
Auto-Stage | Type | Motorized |
Dimensions | 200 × 180 mm | |
X-Y Travel | 100 × 100 mm | |
Motorized | Step motor | |
Resolution | 0.5um | |
Driving Controller | VickyControl2000 | |
Hardness Testing Software | 3A: Auto-stage; Auto-focus; Auto-measurement | |
PC system | DELL OptiPlex3046MT | |
LCD monitor | 21.5” Dell LCD Monitor | |
Executive Standard | ASTM E-92, ISO 6507, GB/T4340 | |
Net. Weight | 150Kg | |
Power Supply | AC 220V/50Hz or 110V/60 Hz | |
![]() Tel: 0086-0769-2318 4144
Tel: 0086-0769-2318 4144
![]() Mobile: 0086-137 2828 8444
Mobile: 0086-137 2828 8444
Copyright © 2026 Sinowon | All Rights Reserved.

